Tools Included
Prior to performing this procedure, you will need to have the following tools:
- 6 #10-32x5/8” screws
- 6 #10-32 nylon lock nuts
- 12 #10 flat washers
Tools Required
- Phillips Screwdriver
- 3/8” nut driver or socket
Parts Included
Completion Time
We estimate that it will take 30 minutes to perform this procedure. Keep all hardware organized as
you work.
WARNING: Please have a certified electrician check voltages on the power supply before
installing new components. The voltage should be 24 volts.
Powering Down the Auto Sentry flex
WARNING: Failure to turn off the Auto Sentry increases the risk of serious bodily injury or death;
and also, may cause the credit card reader to go into a tamper state and if that happens, the credit card reader will have to be replaced.
- On the site server desktop, click on the VNC icon for the Auto Sentry flex.
- On the menu bar, click the Windows Flag icon.
- Click the Shutdown button.
- Wait until the Auto Sentry flex display goes to a white screen.
- With the hex key, open the rear doors of the Auto Sentry flex.
- Turn off the power switch inside the Auto Sentry head.
- Turn off both breakers inside the Auto Sentry head by pressing the blue buttons on the breakers until they click out.
- Turn off the breaker inside the Auto Sentry base by pressing the blue button on the breaker until it clicks out.
- Shut off the electricity to the Auto Sentry by turning off the Auto Sentry breaker inside the ICS power distribution box.
Removing parts to Install
- On the right side, disconnect the coin hopper cable and remove the cable chain from the coin hopper drawer.
- Remove the coin hopper from the Auto Sentry.
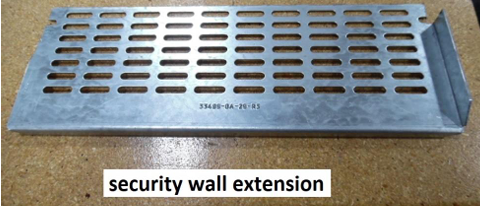
- Mount the security wall extension on the right side of the center security wall. Align the slots in the extension with the holes in the security wall.
- Using the screws, nuts, and washers provided, attach the extension at 6 places. Push the screws with washers in from the right side, and attach the nuts with washers on the left side.
- Slide the coin hopper drawer into the back right side of the AS head. Engage the rails on the drawer with the brackets in the head. Push the drawer all the way in until the black clips on the rails are engaged.
- Connect the female end of the chain to the male connector on the drawer.
- Connect the end of the cable in the chain to the connector on the wires attached to the coin hoppers.
Powering Up the Auto Sentry flex
- Turn on the electricity to the Auto Sentry Flex by turning on the Auto Sentry breaker inside the ICS power distribution box.
- Turn the breakers on inside the Auto Sentry flex by pressing the blue buttons on the breakers until they click in.
Inside the Auto Sentry flex, turn on the power switch to boot the system.
Comments
0 comments
Article is closed for comments.